

How to Raise Baby Fish Fry in Your Aquarium
One of the most thrilling parts of the aquarium hobby is getting your fish to breed. If you are taking good care of your fish and feeding them well, one day you may spot a tiny baby darting around the tank. While accidental fry are always exciting, there are several ways you can increase their survival rate or boost your numbers if you plan on selling them for profit.
1. Protect the Eggs from the Parents
Many fish do not show any parental care towards their offspring and will happily eat their own eggs that they just laid a few seconds ago. Therefore, the first step is to save the eggs from being gobbled up. Use one of the following methods based on the species and their egg-laying behavior:
- If the eggs are sticky, you can provide sites for the eggs to be laid, such as yarn spawning mops, dense plants (like java moss or frogbit), ceramic tiles, or spawning cones. Once the eggs are laid, you can move the spawning site to a safer location.
- If the sticky eggs are laid on the aquarium glass or other immovable objects, you can remove the parents from the tank. Another method is to manually collect the eggs by rolling them off with your fingers or using a plastic credit card.
- If the eggs are freely scattered around and don’t stick to things, you can use layers of marbles as substrate to allow eggs to fall in between the cracks where the parents can’t reach them. Another similar technique is to place a mesh screen or plastic mesh from the craft store just above the bottom of the aquarium floor to let the eggs fall through. Some breeders like to put mosses or other bushy plants underneath the mesh as additional protection.

Some fish like discus prefer to use spawning cones or tiles to lay their eggs on vertical surfaces.
- Most cave-spawning fish (like plecos and dwarf cichlids) are good at guarding their eggs, but new parents are often prone to eating them. If you wish to hatch the eggs yourself, use an appropriate-sized pleco cave, coconut hut, Apistogramma cave, or PVC pipe for the fish to spawn, and then take away the cave as soon as the eggs are laid.
- Certain African cichlid species are mouth brooders that protectively hold their eggs and fry inside their mouths. However, some breeders choose to strip the female of the eggs (or fry) to prevent the babies from being accidentally swallowed, stop the fry from being released into the main tank, and give the mother more time to recover from her duties. This is an in-depth topic that extends beyond the scope of this article, so do your research to learn more about stripping eggs and which method works best for you.
Once the eggs have been isolated, now it is time to hatch them. Eggs, especially unfertilized ones, are prone to growing fungus, which can quickly spread and ruin an entire clutch. Larger eggs that belong to African cichlids, plecos, peacock gudgeons, and the like can be placed in an egg tumbler that constantly blows fresh, oxygenated water onto the eggs and discourages fungal infections. Another method is to place the eggs in a small, plastic container of water with an air stone for circulation, and keep the eggs warm by floating the container in an aquarium or clipping it to the side of the tank wall. You can add a few drops of methylene blue (until the water turns slightly blue) or some alder cones as a gentle fungicide, and then do a couple of 50% water changes in the container once the eggs hatch. With both techniques, use a turkey baster to remove any eggs that have fungal growth.
2. Remove the Fry
After the eggs have hatched, the baby fish still aren’t out of the danger zone. Separating the fry from the adults not only prevents them from being eaten, but it also allows them to grow bigger and faster because there is less competition for food. Additionally, it is best to keep the newborns in a smaller container so that they don’t have to expend as much energy swimming to reach their meals. A net breeder or breeder box with a clump of moss for shelter is ideal because it allows the fry to live in the same tank and water conditions as the parents. For livebearers that bear live young instead of laying eggs, you can place the pregnant female in the breeder box when she’s about to give birth and then remove the mother after all the fry have arrived.

A breeder box allows you to raise fry in the same aquarium as the adults while protecting them from predation.
When the baby fry are bigger and stronger, move them to a larger grow-out tank to give them more room to swim around. If some fry are growing faster than others, you may need to separate them out by size into multiple aquariums to prevent cannibalism and lessen competition for food. This sorting process is also an opportunity to cull any sickly fry if needed to prevent defective genes from spreading and to avoid giving customers unhealthy fish.
3. Provide Lots of Cover
For people who do not have the room for an extra grow-out aquarium, you can try colony breeding instead, in which the parents and young are raised in the same fish tank. While this approach may not yield the highest number of offspring, it is certainly easier in terms of time, cost, and space. To increase the fry survival rate, the key is to provide tons of little nooks and crannies where the babies can escape into but the adults cannot fit inside. For example, breeders often make DIY fish fry traps using floating pond plant baskets or craft mesh rolled into a tall cylinder using zip ties. This allows you to either place a pregnant livebearer inside the trap so that the fry can escape out the holes, or vice versa where the parents are outside the trap and the fry can swim inside for safety. A giant wad of Easter basket grass is also used by breeders to create a dense mass that only the tiniest babies can swim in between.
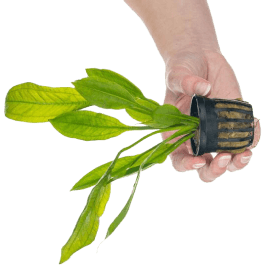
If you prefer a more natural-looking form of shelter, a thick jungle of live aquarium plants also serves the same purpose. Our favorites for colony breeding include java moss, Pogosteman stellatus ‘octopus’, water sprite, and floating plants with bushy roots (like dwarf water lettuce and frogbit). Some species prefer a pile of rocks with small gaps in between for the youngest fish to squeeze past. Finally, aquarium decorations and small artificial caves can provide additional hiding places for fry to dart behind if being chased.

For colony breeding, adding lots of aquarium plants can help hide your baby fish.
4. Keep Good Water Quality
Baby fish are less hardy than adult fish and therefore can be more sensitive to any toxins or excess waste in the water. Make sure to include gentle filtration like a sponge filter, and regularly maintenance the filter so that it doesn’t become clogged up with fish poop. If you’re using a hang-on-back (HOB) or other filter with an intake tube, cover the intake with a pre-filter sponge to prevent little ones from getting sucked into the motor.
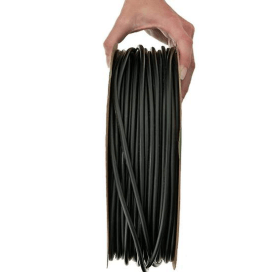
Since you will be feeding the fry a lot, consider doing daily or multiple water changes per week at first. This part can be a little stressful because no one wants to accidentally vacuum up any babies. When cleaning a breeder net or small container, a turkey baster is a nifty tool for carefully removing small amounts of water. For grow-out tanks, you can also create a tiny aquarium siphon using a length of airline tubing. Attach one end of the tubing to a chopstick with rubber bands, and then place that end into the aquarium water. The chopstick allows you to easily maneuver the siphon and avoid the baby fish. Use your mouth to suck on the other end of the tubing to start water flowing through the tiny siphon, and then place that end into a white bucket for collecting dirty water. The white bucket allows you to more easily see any fry that accidentally escape so that you can retrieve them using a turkey baster or little shrimp net. You can also have the siphoned water stream into a fish net or breeder net clipped to the side of the bucket, which will then collect any fry that escape.

Make a DIY fry siphon out of tubing, a chopstick, and rubber bands for cleaning grow-out tanks.
5. Feed Tiny Foods Multiple Times a Day
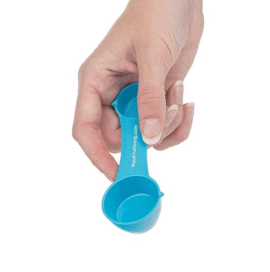
Fry have tiny mouths and tiny stomachs, and just like human babies, they must constantly eat all throughout the day. Newly hatched fish come with a yolk sac that feeds them until they are strong enough to freely swim and look for food. Then they require multiple small meals, up to 3-5 times a day if possible. You can set alarms on your phone or even use a automatic fish feeder for larger foods. The smallest newborns (e.g., rainbowfish and tetras) should be fed nearly microscopic foods like green water, infusoria, fry powder, and vinegar eels. Larger newborn fish (e.g., livebearers and African cichlids) can almost immediately eat crushed flakes, Repashy gel food, and Easy Fry and Small Fish Food.

Hatching live baby brine shrimp to feed your fish fry is the best way to increase their growth and health.
However, the #1 fry food that every veteran fish keeper and fish farm knows will bring out the best growth and numbers in your breeding projects is live baby brine shrimp. Not only are they packed with highly nutritious proteins and healthy fats, but they also actively swim in the water column, triggering your baby fish’s hunting instincts so that their bellies become filled with delicious, pink crustaceans. If you haven’t tried hatching your own baby brine shrimp, check out our step-by-step tutorial and give it a try.