How to Share 1 Air Pump with Multiple Aquariums
As you may know, we are big proponents of using sponge filters in all of our aquariums, but what happens if you have multiple tanks running sponge filters? Is there any way to save money (and improve cable management) by only using one air pump to run all the filtration? It depends on how many tanks need air and how strong your air pump is, so here are some different configurations to try:
- 2 tanks next to each other can share a dual-outlet air pump. If you only have a single-outlet air pump, you can use a T airline splitter to split the airline tubing into two routes. However, you may need to add two air valves (one for each route) so you can balance the amount of air flow each tank is getting.
- For 2–4 tanks on a vertical rack, a 4-way metal gang valve is great for sharing the air. It comes with 2 inlets, so you can use either the single- or dual-outlet air pump. The 4 outlets each come with their own air valve so you can individually adjust the air flows or shut them off completely.
- For a wall of fish tanks where a 4-way gang valve is not enough, we recommend making your own gang valve out of PVC pipe (using our instructions below).
- For an entire fish room of tanks, consider upgrading to a central air system that runs on a linear piston air pump.
Follow these steps to learn how to make a DIY gang valve that can run off an air pump that uses normal aquarium airline tubing. Depending on how many tanks you have and how deep your aquariums are, you may need to get a more powerful air pump.
Instructions for DIY Gang Valve
- Gather the materials.
- ½ to ¾ inch PVC pipe with Schedule 40 thick walls (enough to cover the length of your wall of tanks)
- Two matching PVC caps
- Ziss plastic air valves
- Painter’s tape or masking tape
- Sharpie marker
- Electric power drill with drill bit set
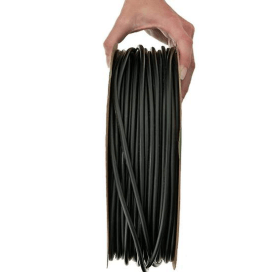
- Airline tubing
- Check valve
- Single-sided, one-hole pipe straps (metal or plastic straps for mounting tubing or electrical conduit
- Optional: PVC glue or super glue gel
- Optional: PVC 90-degree elbows
- Place a long strip of painter’s tape or masking tape along the entire length of the PVC pipe. Next, you are going to draw a straight line all the way down the middle of the painter’s tape (from one end of the pipe to the other). Place the PVC pipe and Sharpie marker flat on the table so that they are perpendicular to each other and the Sharpie starts on the right side of the PVC pipe. Rotate the pipe until the marker tip is aimed at the middle of the tape, and then glide the Sharpie straight across the table from right to left so it draws a perfectly straight line on the tape.

- Mark the tape where you want to drill the holes in the pipe. Air will exit through each of these holes via an air valve and airline tubing to reach your aquarium, where they can be used to provide air for a sponge filter, air stone, or other air-driven device.
- Use a small piece of scrap pipe to test different drill bit sizes and see how big of a hole you need to have a tight friction fit for the air valve to fit into the PVC pipe. For example, a drill bit size of 13/64th inch works for the Ziss air valve.)
- Use the electric drill and appropriate drill bit to drill the holes in the PVC pipe at the marked locations. Go straight up and down into the pipe without any wobble, and don’t make the hole too big. Be careful if you have lots of holes to drill because eventually the drill bit may get hot enough to melt the PVC pipe.

- Peel off the tape and excess plastic wisps. Firmly insert the air valves into the holes until they have a tight friction fit. (Optional: you can seal the air valves with glue if needed.)

- To create an input hole for the air, take one of the end caps and drill a hole into the center of it. (If you need two input holes, follow the same instructions for both end caps.) Just as you did with the air valves, use a small piece of scrap pipe to find the right drill bit size for a tight friction fit. (For example, a 7/32nd inch drill bit worked well for the Aquarium Co-Op airline tubing.)

- Cut the airline tubing end at a slant so that it has a pointy end that’s easier to guide in. It should be somewhat difficult to pull the airline tubing through, so lubricate the airline tubing with saliva if needed. Twist and push the pointed airline tubing into the end cap hole until it’s about 0.5–1 inch deep. Pull the tubing back out a little bit, and then it should be tight. You can seal the end cap hole with super glue if you want. Blow through the airline tubing to double-check that air is successfully traveling through it.

- Place the PVC caps on each end of the PVC pipe. Force fitting the caps (without sealing them) is fine because not enough air will leak out. However, for larger pipe diameters, we recommend sealing the caps with PVC glue.
- Attach the air pump to the other end of the airline tubing. Install the check valve in between the air pump and gang valve to prevent water from siphoning toward the air pump during a power outage.
- To mount the PVC pipe to the wall, use single-sided, one-hole pipe straps that tightly fit around the PVC pipe. The PVC pipe can be hidden behind fish stands, coaches, or other furniture. Now you can use airline tubing to connect each air valve to a sponge filter or other air-driven devices.

- If you choose to expand to another wall of tanks, you can remove one cap of an existing gang valve and use a PVC 90-degree elbow to add another DIY gang valve that bends at the corners of the wall. Ideally, the PVC tubing could be connected in a loop with air being fed into the PVC pipe at one or two locations.
For more details, watch a video demonstration of this DIY project:
Good luck with your new gang valve! To learn more, see our entire collection of DIY projects for the aquarium hobby.
