
Most fish do not show any parental care toward their offspring, so when they lay eggs or give birth in an aquarium, the next generation can easily become a quick snack for the adults. In the wild, babies try their best to hide from would-be predators by using camouflage, swimming to shallow waters, and taking cover in dense vegetation and tiny nooks. In an aquarium, we can help increase their survival rate even more by using a breeder box to contain the fry and protect them from larger fish.
What is a Breeder Box?
A breeder net or box is a container used to temporarily hold tiny babies, eggs, or even sick fish that need to be isolated while they heal. Most breeder boxes float at the water surface or attach to the side of the aquarium so that the fry share the same water as the rest of the fish. To prevent the water inside the container from getting stagnant, dirty, or low in oxygen, we like using the Ziss Premium Breeder Box. It hooks up to an air pump to bring water into the box and comes with three mesh screens for maximum water flow.
How to Install the Ziss Breeder Box
- Gather the following materials:
- Cut a length of airline tubing that is approximately 18-24 inches (45-60 cm) long. Attach the air stone (included with the Ziss breeder box) to one end of the airline tubing.

- Fit the air stone inside the water lift channel so that the air stone rests at the bottom in front of the grate and the airline tubing exits out the hole at the top.
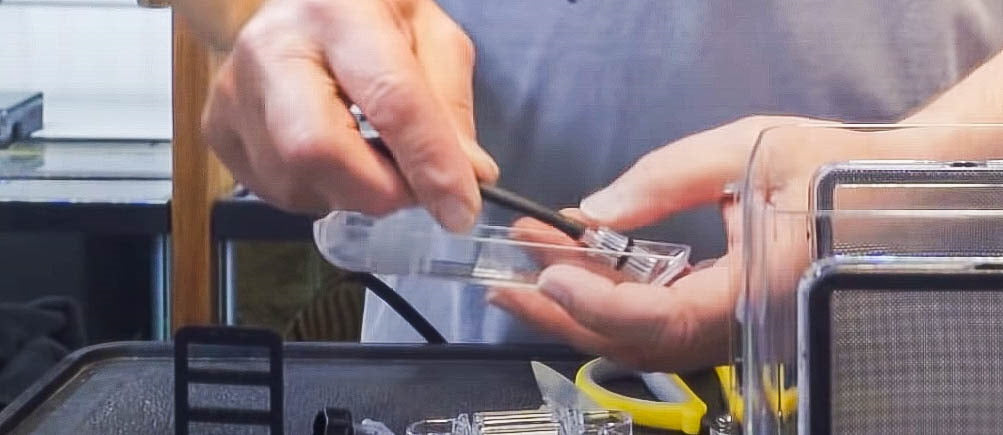

- Snap the water lift channel onto the two vertical ridges on the breeder box, starting from bottom edge.

- Select whether to attach the breeder box to the aquarium using the hanger or the suction cup bracket.
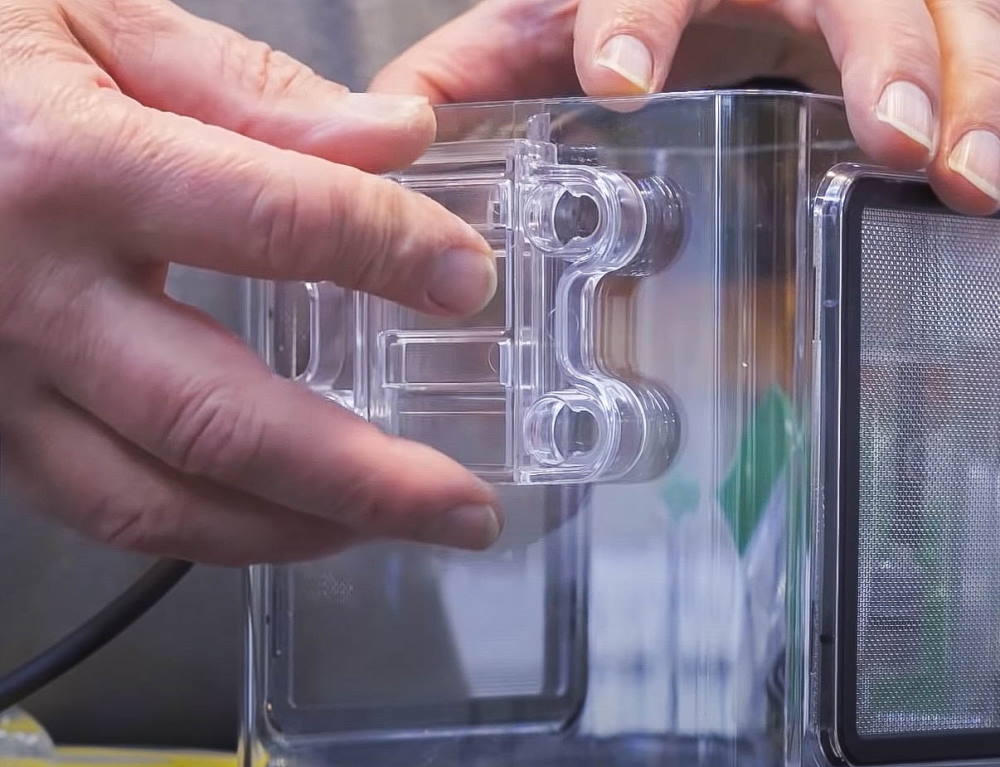
- To use the suction cup bracket, attach the four suction cups onto each corner of the bracket. Find the clear tab on the breeder box (located on the opposite side from the water lift channel) that juts out and turns downward at a 90° angle. Insert the tab into the bracket and then slide the bracket vertically upwards to lock into place.
-
- To use the hanger, insert the clear tab on the breeder box into one of the rungs of the hanger and slide the hanger upwards. (To adjust how high or low the breeder box hangs in the aquarium, try inserting the downward tab into another rung.) Tighten the large, plastic screw into the hole in the hanger.

- Place the breeder box in the fish tank and secure it to the side of the aquarium wall. (The loose end of the airline tubing without the air stone should hang outside of the tank.) Position the top of the breeder box slightly above the water line.
- If using the suction cup bracket, press the breeder box into the tank wall until the suction cups engage and the breeder box is firmly attached.
- If using the hanger, hang it on the aquarium rim and use your fingers to tighten the screw until the breeder box is fixed in place.

- Attach the check valve onto the loose end of the airline tubing so that the end of the check valve with the flapper (looks like a colored or horizontal bar) is facing away from the aquarium and towards the air pump.

- Put the air pump in a location where it can reach an electrical outlet if needed. Cut a second length of airline tubing that is long enough for the air pump to reach the check valve. Connect the air pump and check valve using the second piece of airline tubing. Plug in the air pump, and then bubbles should appear in the breeder box’s air stone. If no bubbles are produced, you may need to check for air leaks or flip the check valve around.
- Optional: If you would like to add an air valve to control the water flow in the breeder box, cut the second length of airline tubing into two pieces and attach an air valve between the air pump and the check valve.

- Place the fry, eggs, or sick fish inside the breeder box. You can also add live plants or other decorations to provide shelter for the babies.

- Cover the top of the breeder box with the lid. The hole in the lid is used for feeding the fish or easily opening the lid.
Frequently Asked Questions About Breeder Boxes
How do you clean a breeder box? Fish waste and uneaten food may collect inside of the breeder box. To easily remove them, use a turkey baster to suck out the debris. If the sides of the Ziss breeder box start growing algae, you can use a toothbrush or algae scrubber to wipe them down.
How long do you keep fry in the breeder box? In general, the babies should be large enough to not fit in mouths of the adult fish before you add them back into your main tank. For livebearer fry, this may be as soon as 4 to 5 weeks.
What do you do with baby fish you don't want? Once the fry are older and capable of eating flakes and pellets, you can give them away to friends, donate them to a pet store chain, or consider selling them to your local fish store. Read our article below on how to make a little extra cash with fish breeding to support your aquarium hobby.
Subscribe
Get weekly aquarium blog articles right in your inbox.
Recent Blog Posts
Featured Products


